Make Collecting Payments Easy for Your Business and Personal Use
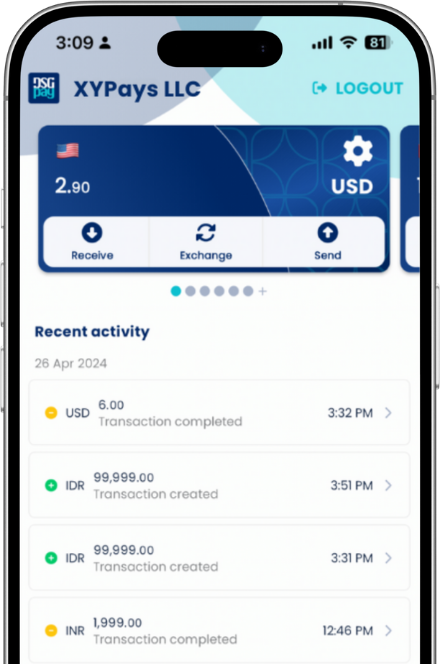
DSGPay simplifies collecting payments and sending funds via one mobile app, allowing you to focus on growing your business.
30 Currencies,
30 Countries,
Global Transfers Made Easy
Enjoy seamless transfers across 30 currencies and countries. Send or receive payments effortlessly with our fast, secure, and cost-effective mobile app.
Collecting payments is easy with DSGPay. Our secure platform helps you get paid quickly while keeping your business name front and center, building trust and credibility with your clients.
Manage
Multiple
Currencies in
One Account
DSGPay makes collecting payments in various currencies easy, allowing you to manage them all in one account without the hassle of multiple setups or complex processes.
Seamless SME Transactions Tailored
for Different Industries
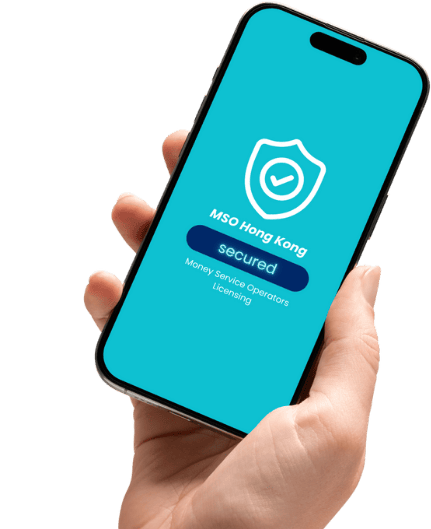
Send Money with
Confidence Backed by
MSO License
Enjoy peace of mind with every transaction, knowing that our services are regulated and compliant under the MSO license.
To start using DSGPay, you need to register an account through the mobile app. This step-by-step guide will show you how to download the app, create an account, and set up your profile for a seamless payment experience.
You have the flexibility to maintain multiple currency accounts on DSGPay, as long as they are compatible with the platform. To incorporate additional currency accounts, simply follow these steps:
Log in to your DSGPay account.
Go to the ‘Account’ tab.
Explore the ‘Account’ section to find the option for adding a new currency account.
By following these straightforward steps, you can seamlessly integrate multiple currency accounts into your DSGPay profile, ensuring they align with the platform’s supported currencies.
To verify your DSGPay Business account, start by signing up and providing essential business details. Then, verify your identity with personal information and required documents. Our streamlined online process ensures efficiency, and verification is typically completed within 1-3 working days.
To submit KYC for your business account, simply follow the step-by-step instructions in our tutorial video.
As a financial institution, we have a responsibility to identify our users. This practice aids us in preventing money laundering and ensuring the security of everyone’s funds. Depending on the source of your funds and the amount you are transferring, we may request that you verify your identity. This measure is in place to ensure the security of your funds.
Click on your name, navigate to ‘Beneficiary,’ and select ‘Settle Account.’ Choose ‘Add new account.’
Input bank details and click ‘Save.’
Confirm the new account in the pop-up.
Note: DSGPay reviews new accounts for security. Check the beneficiary section for status updates. After verification, your account will be ready for use, with a notification from DSGPay.
Years of Experience
0
Billion in Transaction Volume
0
Countries and Growing
0
Global Partners and Payout Agents
0
Manage Cookie Consent
We use technologies like cookies to store and/or access device information. We do this to improve browsing experience and to show (non-) personalized ads. Consenting to these technologies will allow us to process data such as browsing behavior or unique IDs on this site. Not consenting or withdrawing consent, may adversely affect certain features and functions.
Functional
Always active
The technical storage or access is strictly necessary for the legitimate purpose of enabling the use of a specific service explicitly requested by the subscriber or user, or for the sole purpose of carrying out the transmission of a communication over an electronic communications network.
Preferences
The technical storage or access is necessary for the legitimate purpose of storing preferences that are not requested by the subscriber or user.
Statistics
The technical storage or access that is used exclusively for statistical purposes.The technical storage or access that is used exclusively for anonymous statistical purposes. Without a subpoena, voluntary compliance on the part of your Internet Service Provider, or additional records from a third party, information stored or retrieved for this purpose alone cannot usually be used to identify you.
Marketing
The technical storage or access is required to create user profiles to send advertising, or to track the user on a website or across several websites for similar marketing purposes.